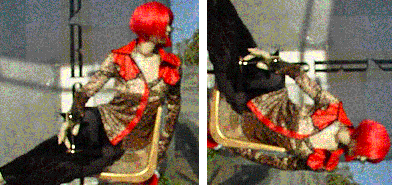
To Rotate Left an Image:
- Select Rotate Left from the Modify menu.

To Rotate Right an Image:
- Select Rotate Right from the Modify menu.
ImageViewer supports a wide variety of image modification actions, including:
You can rotate an entire image by 90 degrees either left or right.
To Rotate Left an Image:
- Select Rotate Left from the Modify menu.
To Rotate Right an Image:
- Select Rotate Right from the Modify menu.
You can flip an entire image either vertically or horizontally.
To Flip an Image Horizontally:
- Select Flip Horizontal from the Modify menu.
To Flip an Image Vertically:
- Select Flip Vertical from the Modify menu.
TIP: Hold the Shift or Option key down to mirror half of an image.
You can crop an image to any selected size by discarding that portion of the image not inside the selection as shown below.
To Crop an Image:
- Use the cursor to select a portion of the image.
- Select Modify > Crop to Selection.
- Save your changes.
You can scale an entire image by a preset or custom amount.
To Scale an Image:
- Select a scale option from the Modify > Scale submenu.
If Other is chosen:
- Enter a figure in the Set Scale % To field.
- Click OK.
Scaling Options:
- 25%
- 50%
- 200%
- 400%
- Other... (enables you to specify a custom scale percentage)
You can invert an image using the Invert option. Inverting an image inverts every pixel in the image. Black becomes white, and vice versa. Color pixels are inverted using the complement value of the current pixel color as shown in in the before and after images below.
To Invert an Image:
- Select Invert from the Modify menu.
You can change the bit depth of an image using the Color Depth option. This is useful for reducing image sizes, matching an image to a specific device depth, or applying the standard Internet color table (216 colors) to an image.To Set an Images Color Depth:
- Select a color depth option from the Modify > Set Color Depth submenu.
Color Depth Options:
- Millions
- Thousands
- 256 Colors
- 16 Colors
- 256 Grays
- 16 Grays
- B/W Diffused
- B/W Direct
- Optimize with Internet Colors
- Optimize with Internet Colors Dithered
You can change the resolution, or dots-per-inch (dpi) of an image using the Set Resolution option. This is useful for reducing or enlarging an image size, or matching a specific printer resolution. Increasing the resolution reduces the image physical size, while reducing the resolution increases the image size.
To Set an Image's Resolution:
- Select a resolution option from the Modify > Set Resolution submenu.
If Other is chosen:
- Enter a figure in the Set Resolution To field.
- Click OK.
Resolution Options:
- 72 pixels/inch
- 150 pixels/inch
- 300 pixels/inch
- 600 pixels/inch
- Other... (enables you to specify a custom resolution)
You can adjust the brightness of an image using the Brightness/Contrast dialog. Drag the Brightness sliders to the left to reduce brightness and to the right to enhance brightness. Use the Before and After images to compare your changes.
To Set an Image's Brightness:
- Select Brightness/Contrast from the Modify menu.
- Drag all the Brightness controls to the desired percentage, or
- Disable the Connect Colors option to individually move sliders.
- Click OK.
You can adjust the contrast of an image using the Brightness/Contrast dialog. Drag the Contrast sliders to the left to reduce contrast and to the right to enhance contrast. Use the Before and After images to compare your changes.
To Set an Image's Contrast:
- Select Brightness/Contrast from the Modify menu.
- Drag all the Contrast controls to the desired percentage, or
- Disable the Connect Colors option to individually move sliders.
- Click OK.
You can adjust the sharpness of an image using the Sharpness dialog. Drag the sliders to the left to reduce sharpness and to the right to enhance sharpness. Use the Before and After images to compare your changes.
To Set an Image's Sharpness:
- Select Sharpness from the Modify menu.
- Drag all the Sharpness controls to the desired percentage, or
- Disable the Connect Colors option to individually move sliders.
- Enter a Radius value (optional)
- Enter a Threshold value (optional).
- Click OK.
You can set a color in a GIF image to be transparent using the Set Transparent option. This option will be disabled for any non-GIF images.To Make a GIF Transparent:
- Select Set Transparent from the Modify menu.
- Select a color in the image to make transparent using the eyedropper.
- Select Save from the File menu.
You can remove the transparency setting from a GIF file using the Remove Transparency option. If the GIF image does not have a transparent color, this option will be disabled.To Remove GIF Transparency:
- Select Remove Transparency from the Modify menu.
- Select Save from the File menu.
You can change an image's color table using one saved from another image using the Apply Color Table option.To Apply a Color Table:
- Select Apply Color Table from the Modify menu.
- Choose a color table file.
- Click Open.
You can save an image's color table for application to another image using the Save Color Table option.To Save a Color Table:
- Select Save Color Table from the Modify menu.
- Enter a name for the color table.
- Click Save.
![]()